

By default, Onfleet sends SMS based notifications to customers giving them real-time information about the status of their deliveries. This automated text based messaging is incredibly useful when a driver is delivering directly to a consumer. That customer can access a live tracking page and know exactly when their precious Sesame chicken is going to arrive!
While text based communications are useful for direct-to-consumer deliveries, many B2B delivery operations prefer to send email confirmations for record keeping and reconciliation purposes. While automated email messaging isn’t specifically supported by Onfleet, take a look below how to quickly configure email messages with a tool called Zapier.
What you’ll need
-
Onfleet account (starter plan or above)
-
Email client (we’ll be using Gmail for this example)
1. Create Zap within Zapier
First you’ll need to login into your Zapier account and press “Make a Zap!” at the top right of the page.
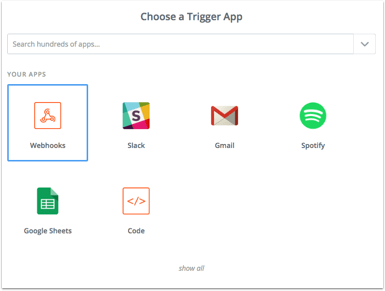
For your trigger, select “Webhooks by Zapier” -> show less common options -> Catch Raw Hook -> Save + Continue. Press copy to save the webhook to your clipboard for use in the next step. Click “Continue”.
2. Register Webhook in Onfleet
Login to your Onfleet dashboard and open your settings at the top right of your dashboard.

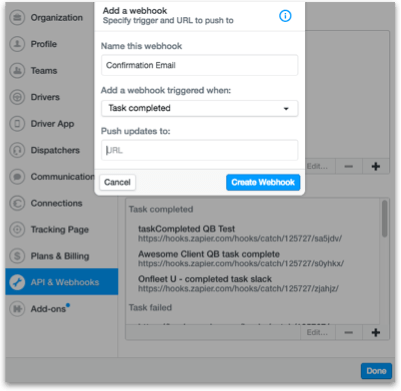
Click on the “API & Webhooks” tab -> click on the “+” button -> name your hook (probably something along the lines of “Confirmation Email”) -> select “task completed” from the drop down of potential triggers -> paste the webhook url that was copied at the end of Step 1. Click “Create Webhook” to register this hook.
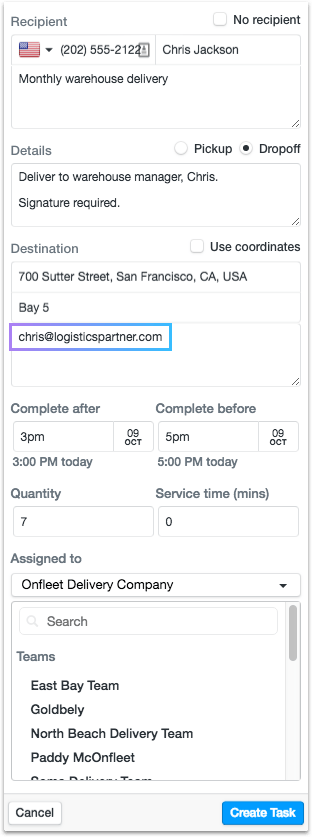
Now, this is important we will be using the “Destination Notes” field within an Onfleet task to put the email address where you want to send a confirmation. This must be populated with only the recipient’s email address in order to send the email to the correct recipient.
Now, assign a task to yourself and complete that task. Return to Zapier and click “Continue” as your hook should have just successfully fired and registered.
3. Parse data within Zapier
Now we need to make the data captured in the raw hook into readable information. To achieve this, set your the first action to run “Code by Zapier” by simply searching and selecting that from the app list.
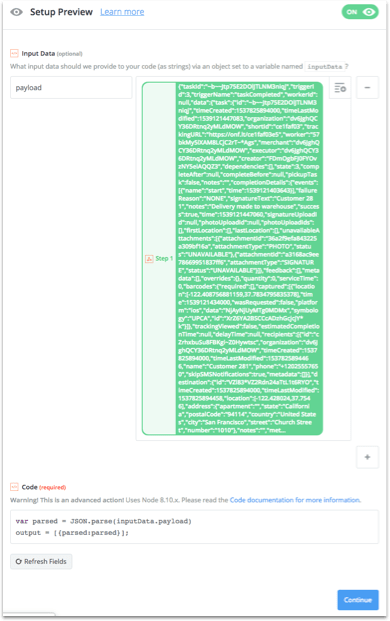
Next, click “Run Javascript” -> “Continue. You will see “Input Data (optional)” at the top left. In the first box underneath that, type: “payload”. Then in the box next to that, search for the “Raw Body” and select that to populate this field.
Copy and paste this code into the box labeled “Code (required)”:
var parsed = JSON.parse(inputData.payload)
output = [{parsed:parsed}];
Press “Send Test to Code by Zapier” -> Finish.
4. Create Confirmation Email
Add another action/search step (on the left side) and select Gmail from the app list.
Select “Send Email” -> click “Save + Continue” -> connect your Gmail account -> “Save + Continue”.
Fill out the appropriate fields composing your email. The important thing to remember is in the “To (optional)” field you must select “Parsed Data Task Destination Notes”, which is where the recipient’s email is stored. Once you’ve composed the email, click “Continue” -> “Send Test” -> Finish.
Turn the Zap on and your automated email confirmations are now live!