
For new users, interacting with any APIs can be daunting, but knowing the basics of Onfleet's world class API can unlock boundless business potential for all levels of your organization. Learning how to integrate with Onfleet will provide tools simply not possible to manually execute within our dashboard. Incorporating high volumes of increasingly complex actions through our API will introduce a level of competitive sophistication that all modern delivery operations need in order to compete in today's landscape.
As a first step towards harnessing our API, today we will show you how to issue your first Onfleet API request to create a task. Throughout this 6-step tutorial, we will be using the Postman app to create a task. Postman is a free tool used to send requests and receive responses via API, including but not limited to, the Onfleet API. While there are other tools out there, this is a great (and FREE) place to start, so head on over and download Postman to complete the tutorial below. You won't regret it!
Once you have the Postman app installed on your machine, make sure you have provisioned an API key in your admin account on Onfleet. To set up your API key please follow this quick guide. With your API key and Postman set up - you can now get started!

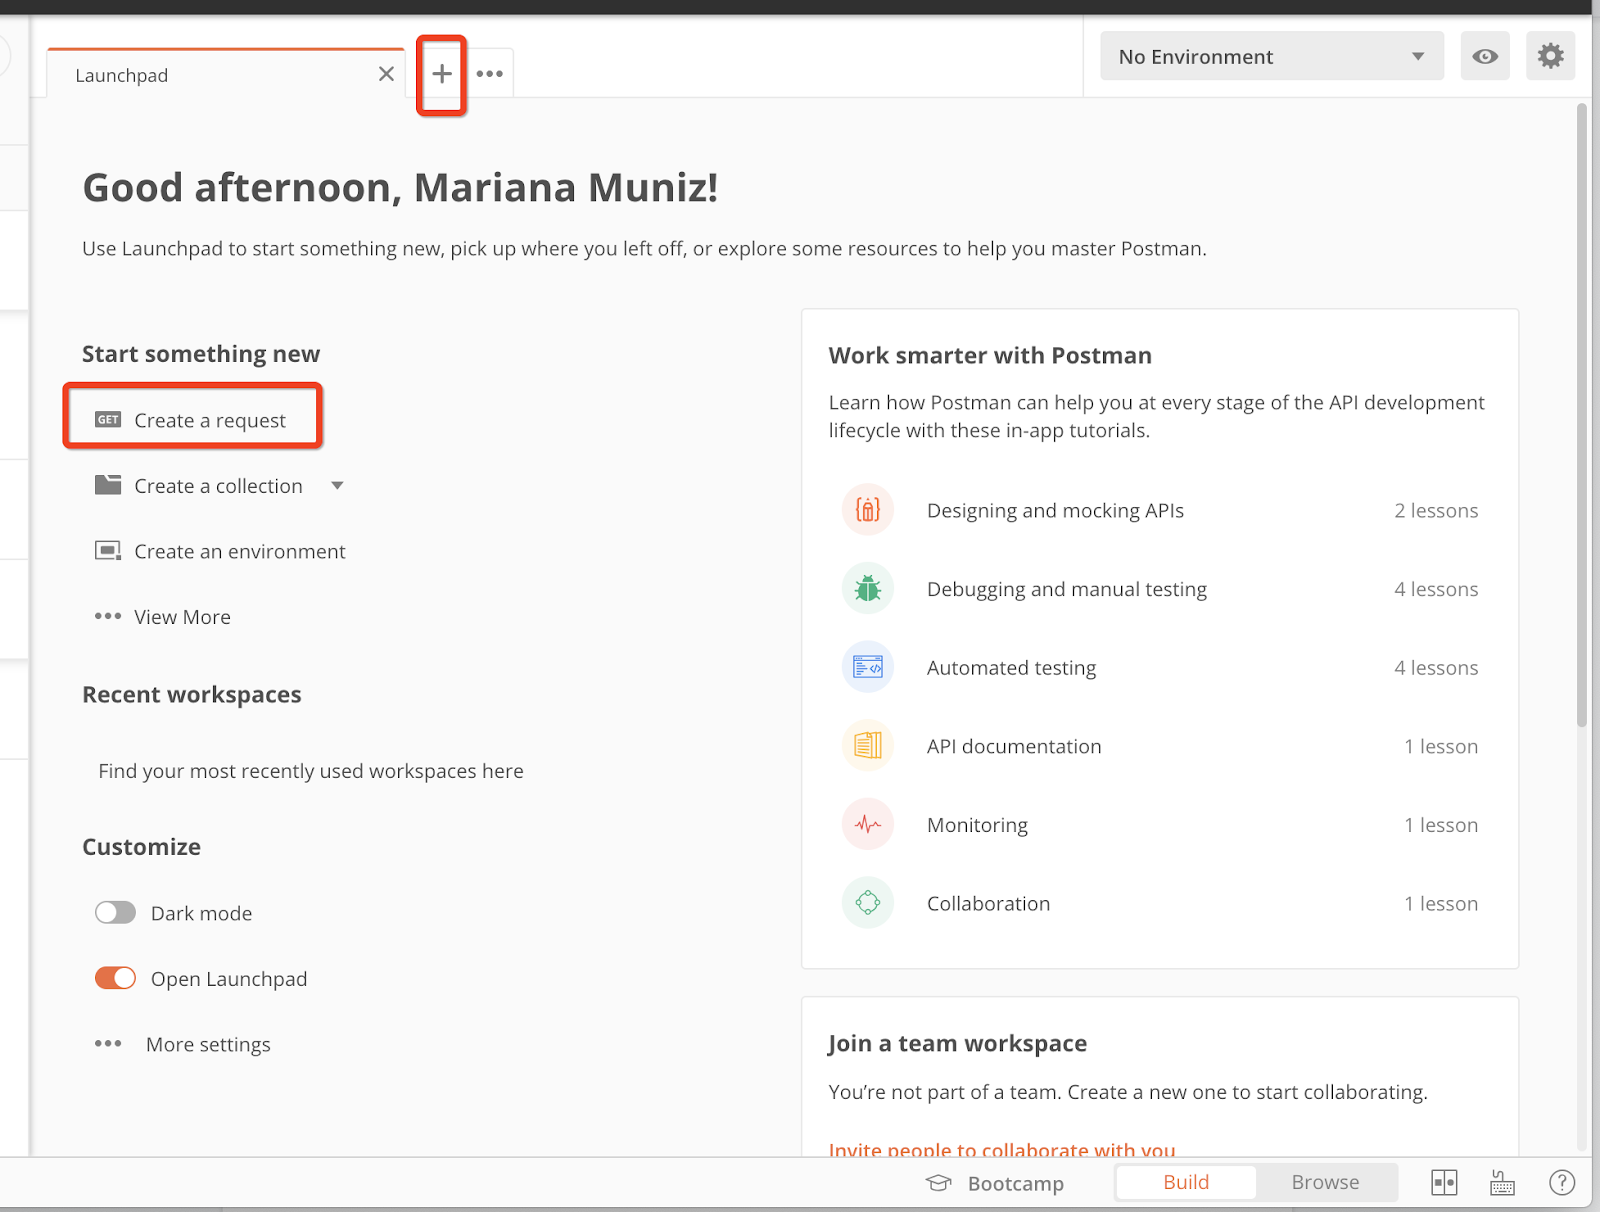
1) Open Postman and select either Create Request or the small + symbol on the top toolbar:
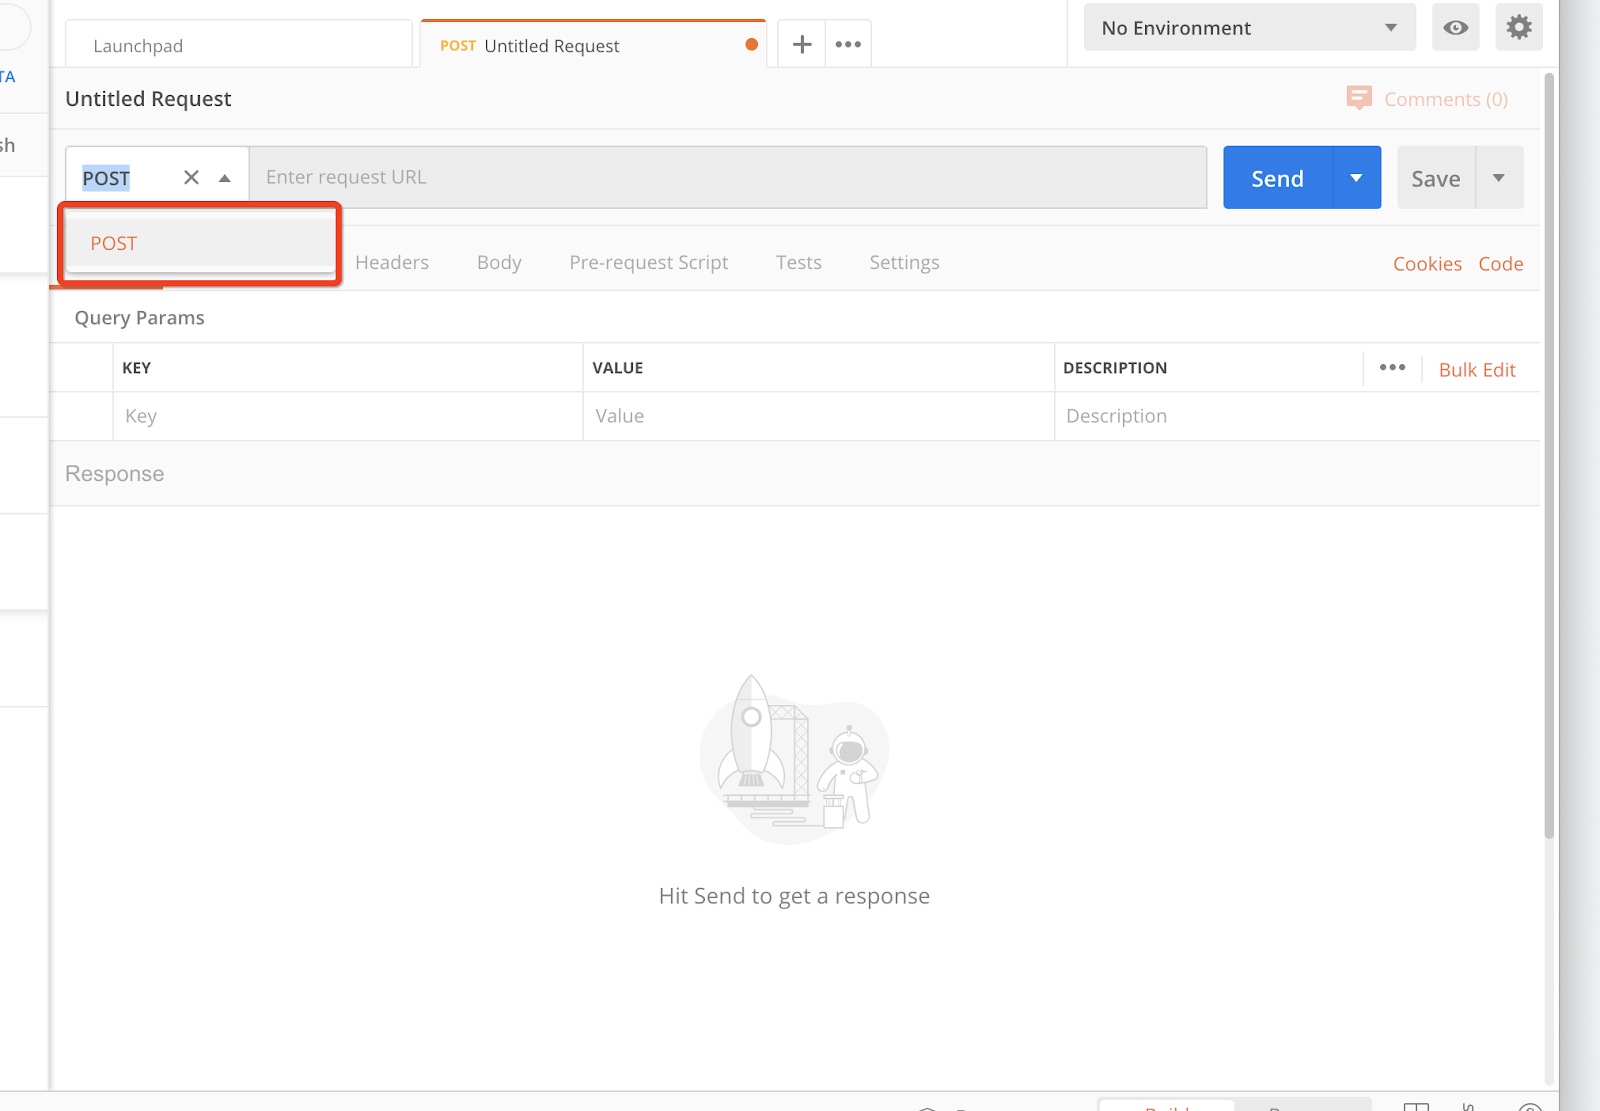
2) Since you are going to create a task - you will want to select POST from the drop down menu before you enter your request. A POST request simply means to create something on the Onfleet API under your organization’s account:
3) Once you have selected POST, you can then enter the request URL in the Request URL section. The URL we want to use here is https://onfleet.com/api/v2/tasks. This is what we call the tasks API endpoint, which is the target endpoint where we are creating the task on:

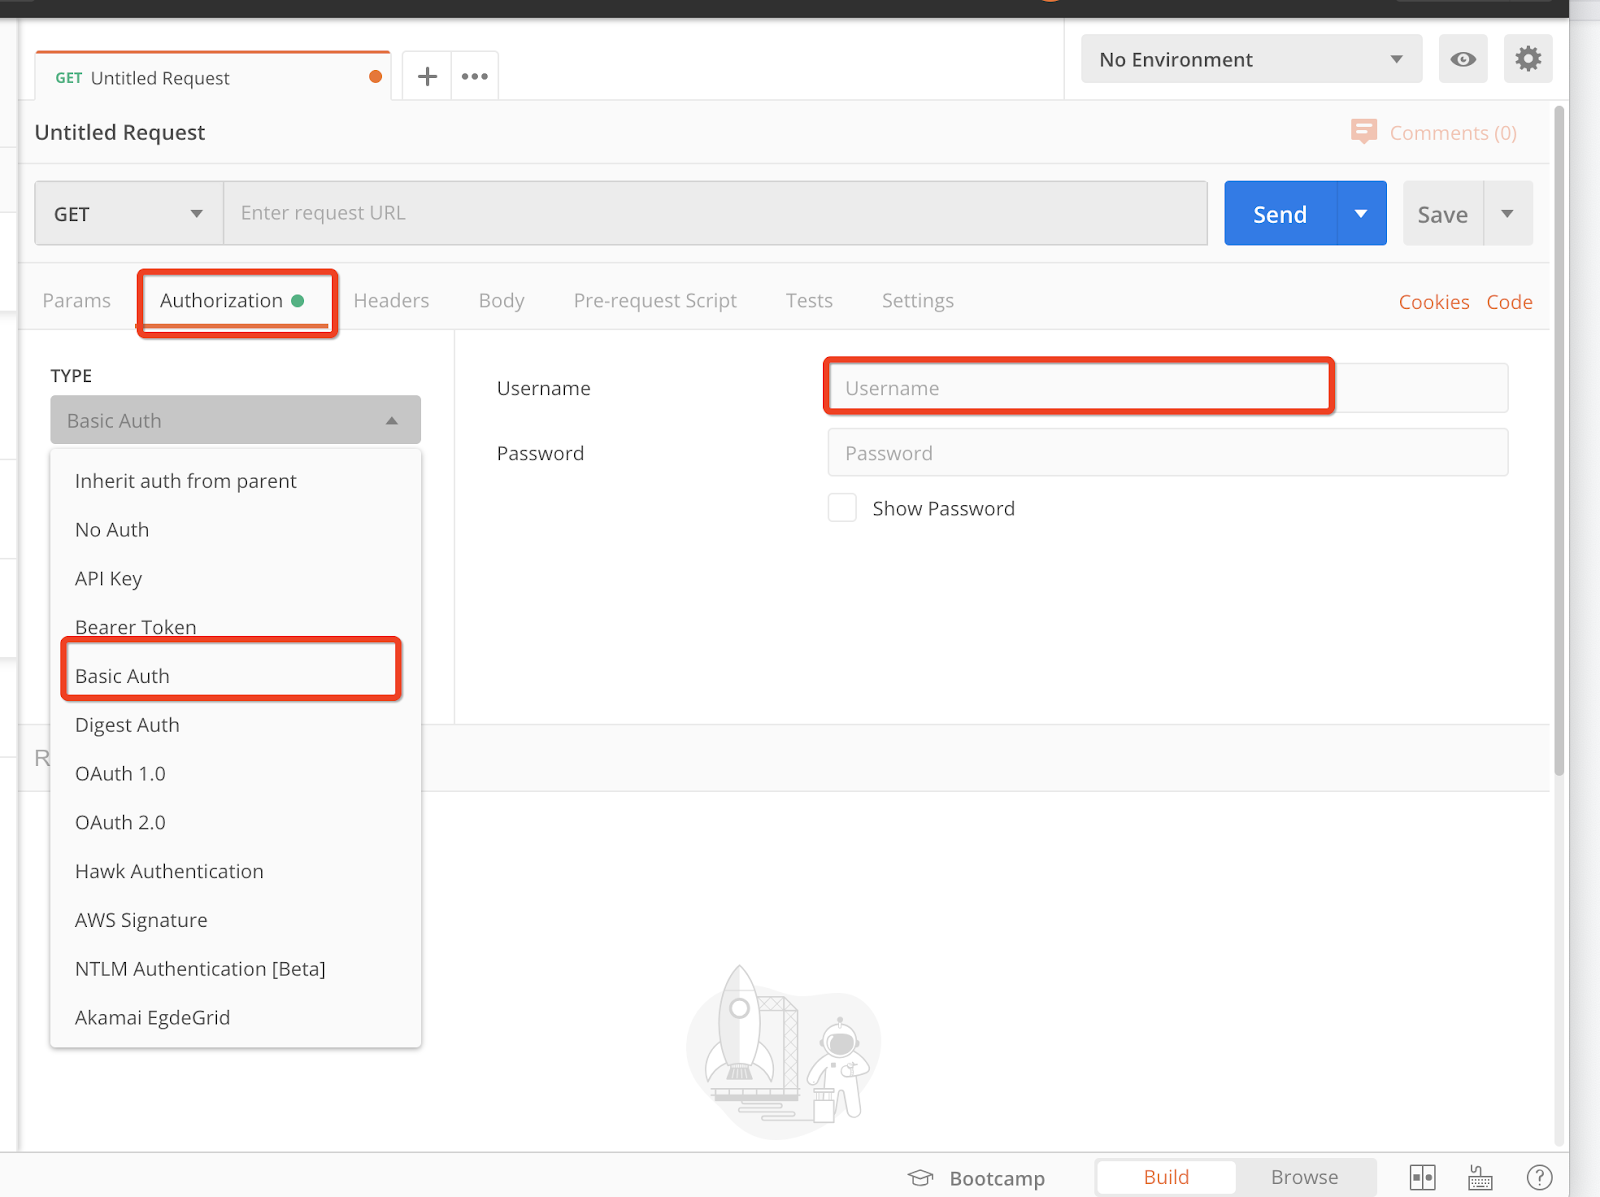
4) Now, you will need to set the Authorization to authenticate your request. Select the Authorization tab, then select Basic Auth from the drop-down (Onfleet uses Basic Authentication). Once you have selected Basic Authentication - enter your API key in the username:
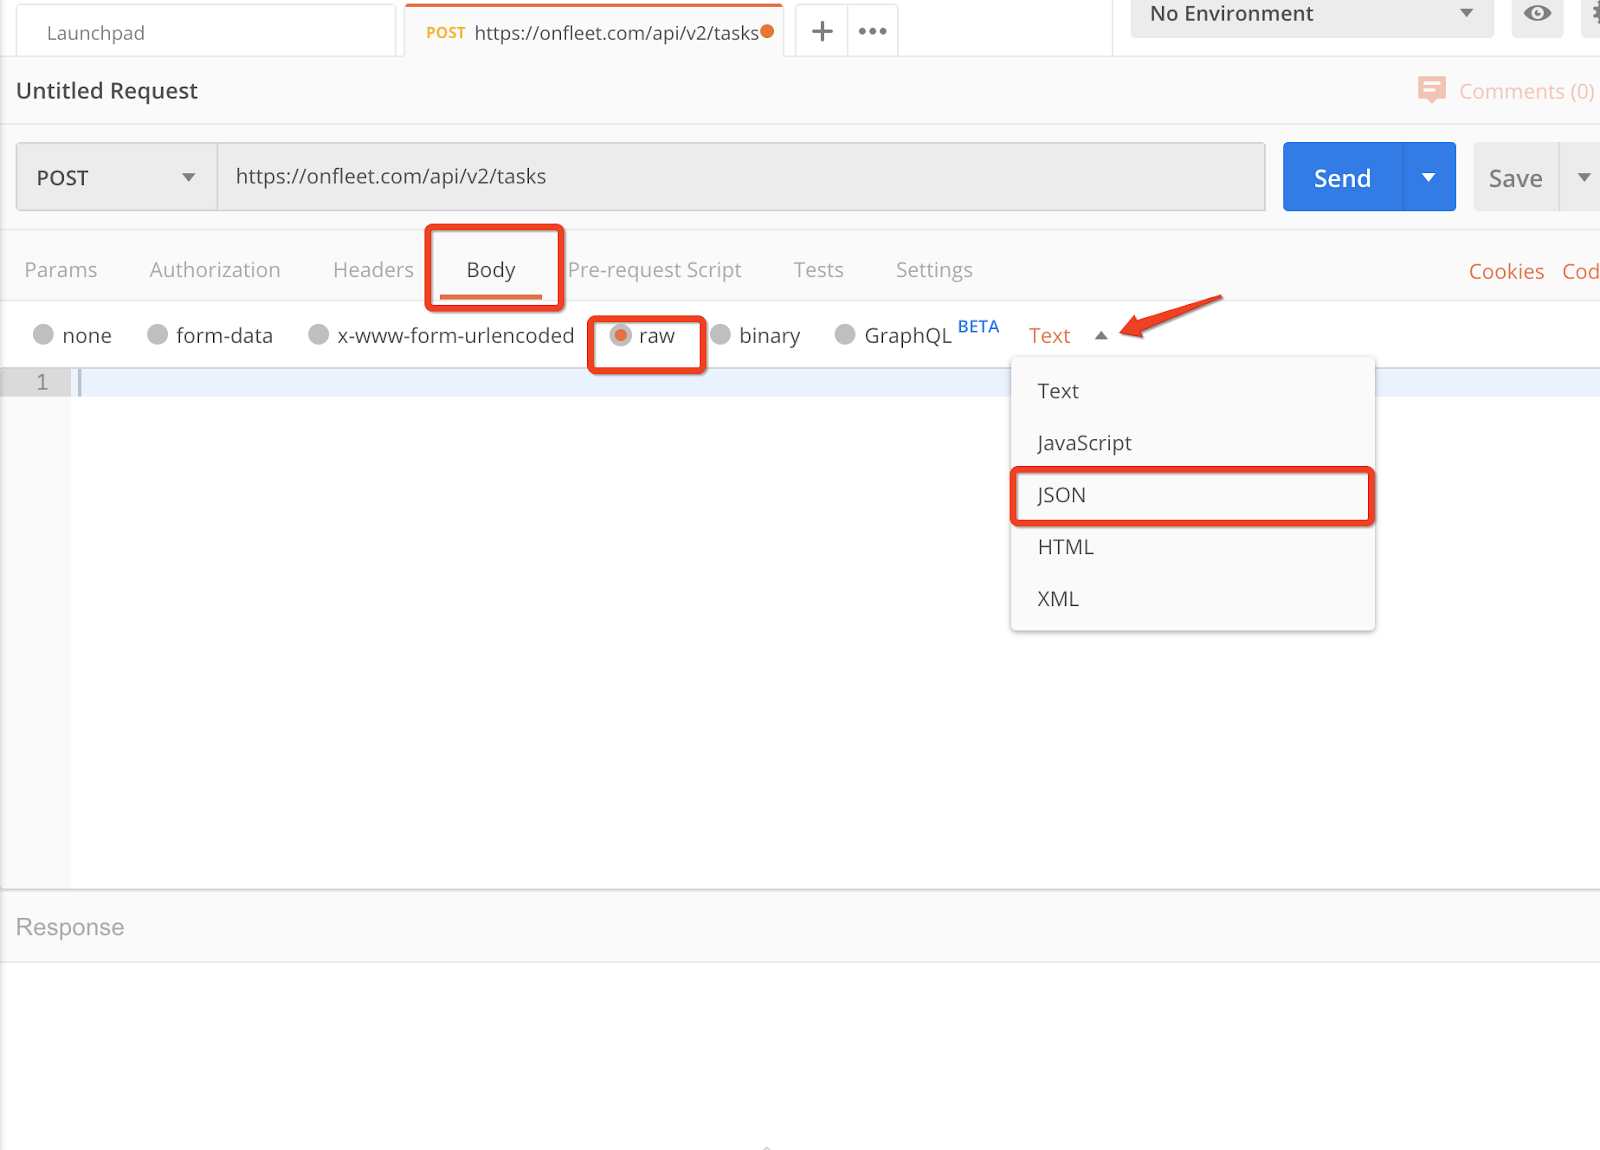
5) Now you will enter the details of your task. These details will be placed within the Body section of Postman. Within the Body section, you will want to select raw format and the JSON option within the drop-down:
Great job so far! Now you get to customize the information you would like for you task. This may seem daunting, but it is truly a case of “fill in the blanks”.
As an example of the information that we will "fill into the blanks", let’s say I run a donut shop and have just received an order with the following information:
- Customer: Bruce Wayne
- Phone Number: +1-905-555-5555
- Address: 30 Rockefeller Plaza; New York, NY 10112
- Complete After: November 15, 2019
- Order Notes: 1 dozen assorted donuts
Here is how the body would look in the POST request using the order information:
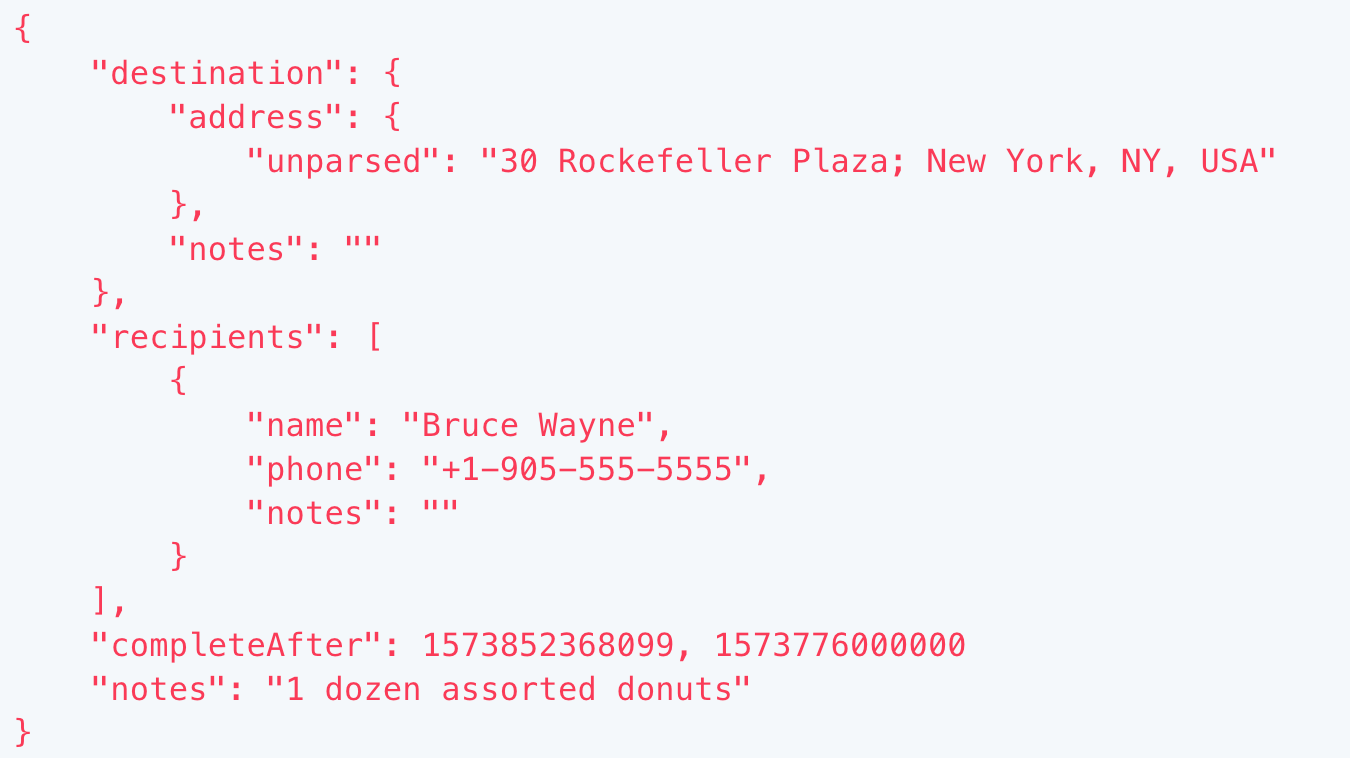
Note: For timestamps, Onfleet uses Unix epoch time format with millisecond precision. In this example, 1573776000000 here translates to November 15th, 2019 00:00 AM GMT time.
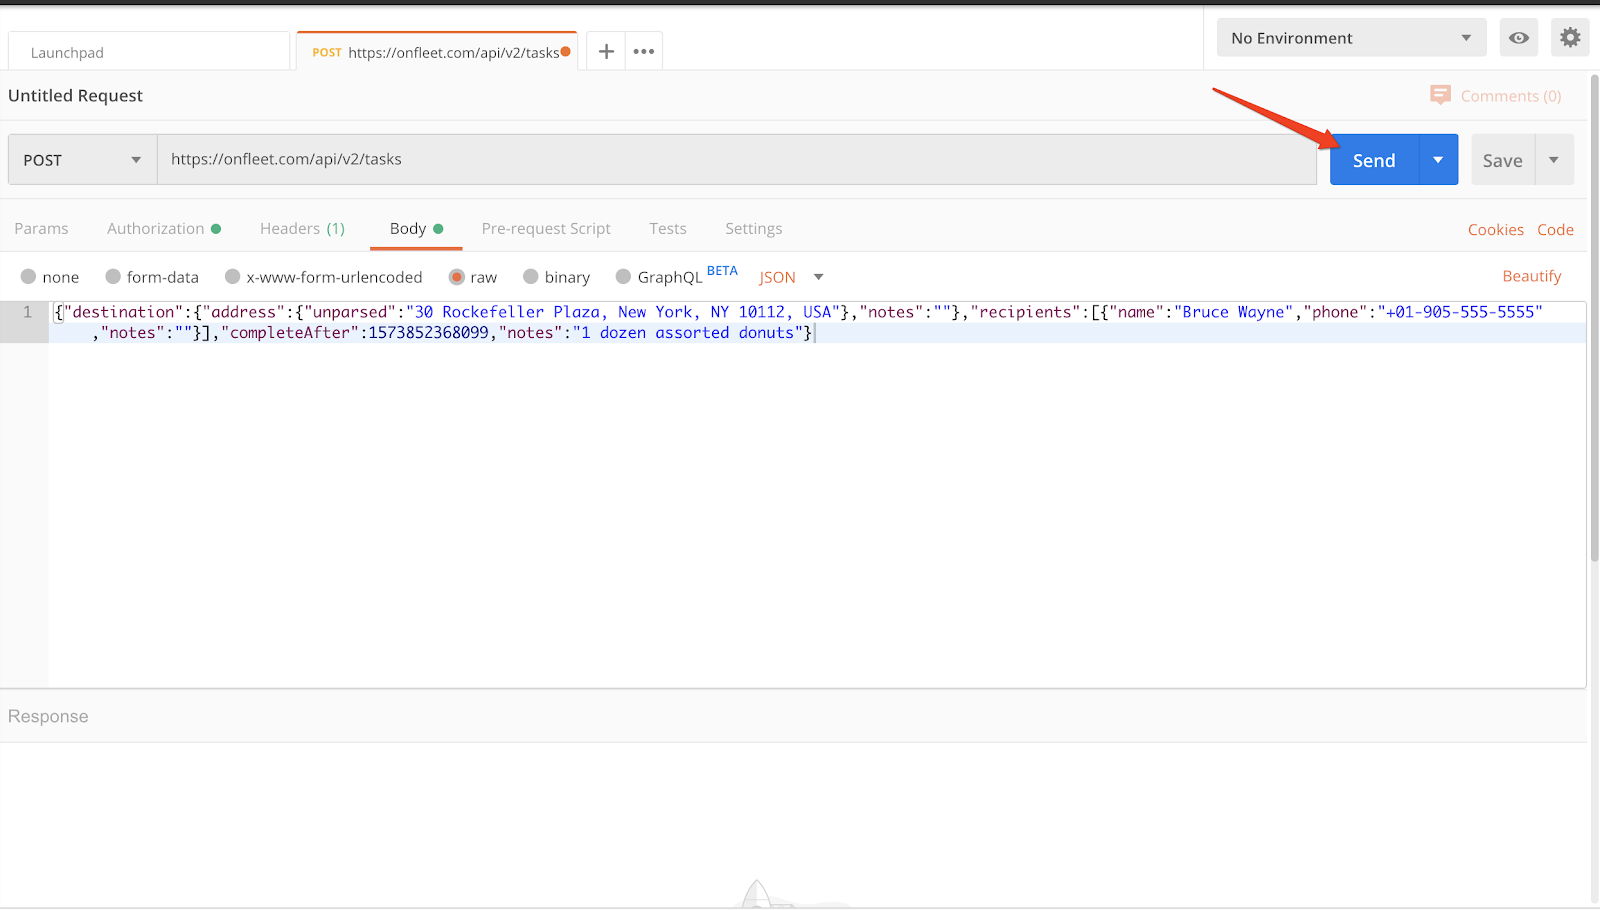
6) Now that we have set our request type (POST), our request URL (Task API endpoint), Authorization, and Task details (body), we can click Send to issue our request to the API:
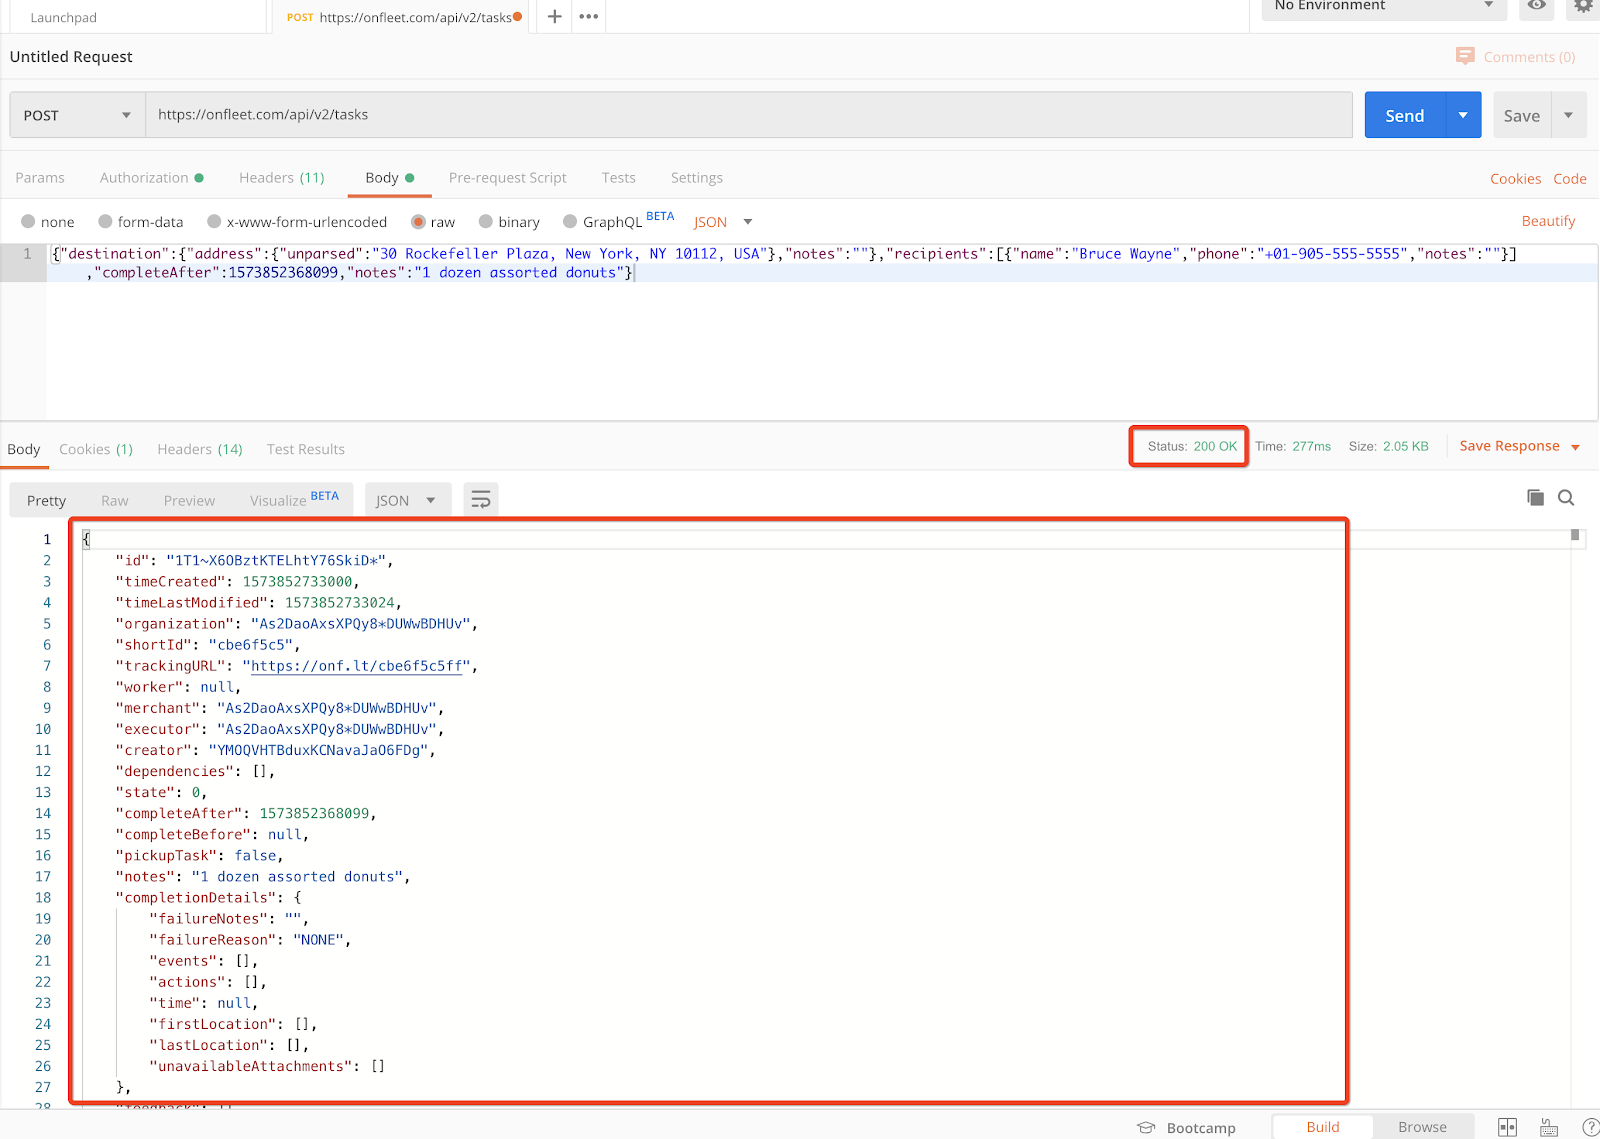
If your request is successful, you will receive a 200 task status with your task information in the Response body:
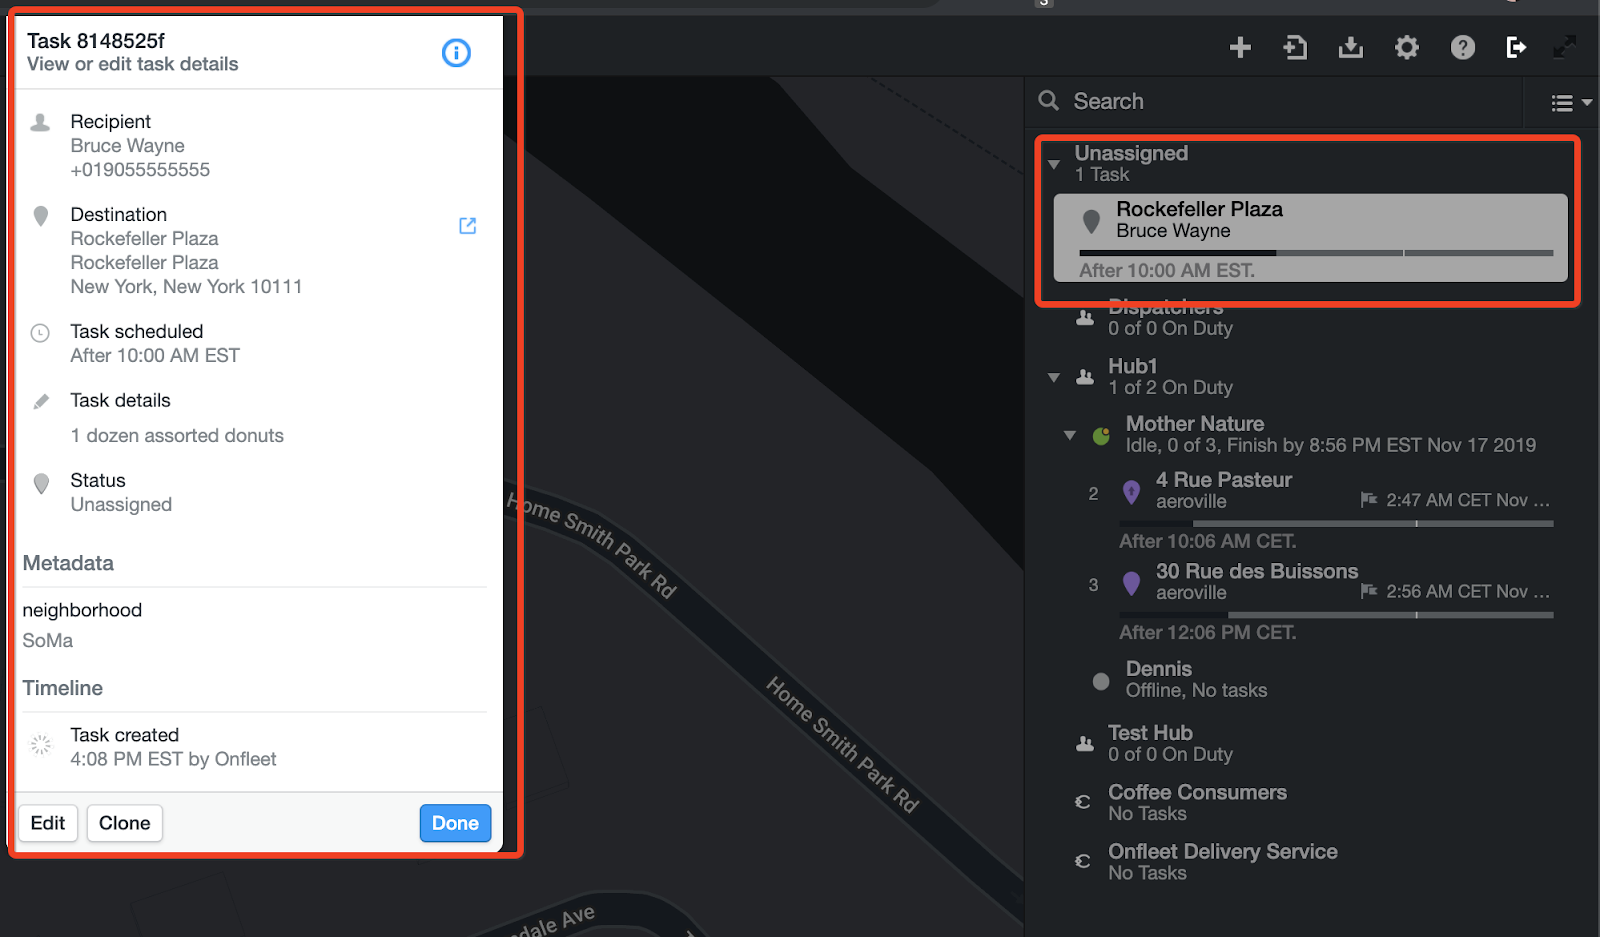
And you will be able to view the task on your Onfleet dashboard:
Congratulations, you’ve successfully created your first task using the Onfleet API. There are so many more programmatic actions you can do within this general framework, but this should give you an idea of how your business can start by creating an Onfleet task! Imagine using this method to integrate your backend order management system and then creating thousands of tasks per day within Onfleet without any manual input from your team.
Of course with more experience, more parameters can be added to your body as you create your tasks, such as setting up proof-of-delivery, creating tasks in batches, setting up auto-assignment and many more. The possibilities are virtually endless.
Learn about how to do all that and more in our API doc!